The objectives to day are finish the bolts and barrel nuts installation on the long rails and work on the twin-vise install.
NOTE: The pictures for this day contain extensive step by step notes. Please refer to them for any questions you might have regarding the details of the installation noted below.
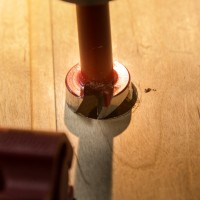
First the bolts and barrel nut install. I am using the bolt and barrel nut hardware from BenchCrafted. The initial holes had been drilled in the legs on the drill press. These initial holes provided the guide for completing the 1/2″ hole into the end of the tenon and rail itself. The tricky part here is the bolts holes do not exactly on center. Mine were about 1/16 to 3/32 off. I drilled a 1/2″ exploratory hole to try to hit the 1″ hole exact. This sorta worked. Ultimately I was able to get the 1″ hole so the bolt would thread on the barrel nut. These will not show in the final construction, it, of course, just bothers me that I could not hit the holes exact.
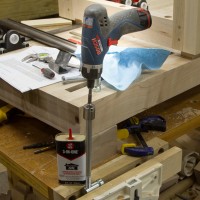
Another note on the bolt and barrel nuts. I had purchased my set years ago. The bolts were galvanized. I cleaned all the threads on my brass wire wheel, then ran the bolts in/out of the nut many times with some 3in1 oil. This gave me a excellent thread fit and was easy to turn the bolts. This is important so you can feel any cross threading with your hand.
After drilling and fitting each barrel nut, I reassembled the legs with the long rails and installed the bolts and barrel nuts. Do not tighten the bolts until all 4 ends are threaded and snug. The bolts were tighten and the joints looked really good.
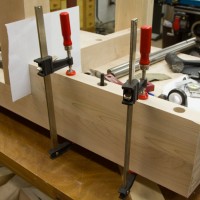
The next step was to continue the install of the twin vise. The two mounting brackets are installed and square to the face of the top. I installed 4 1/2″ lag bolts ( note the final lag bolts are 5 1/2″). I wanted to seat the leg assemblies in the pre-drilled lag bolts holes for a precise fitting with the back boards of the twin vise. The photo ( right ) shows the fitting process for one of the two back boards for the twin vise. There are multiple steps to this installation which are much better described in each of the pictures in the album.
The final state of the twin vise is a 35″ x 7 3/8″ full face. The space of above the shafts is 4 1/2″ The space between the shafts is 24″ ( the shafts are on a 25″ center. ). The front face of the vise will be 2″ thick and the same size as the full face.
Some notable tools and items used in this build:
- BenchCrafted Barrel Nuts
- Lee Valley Socket Adapters for Hand Drills
- Lee Valley 6″ Extra Fine Wire Wheel
- FISCH 1/2-Inch x 10-Inch Long High-Speed Steel Brad Point Drill Bit
In Day 26, I will continue with the installation of the tail vise.
Bench Build Blog Index
Please enjoy the full set of day 25 pictures with detailed comments:


